Tuesday, September 6, 2016

Doctor Who Cosplay - Vortex Manipulator and Pattern

I do so many little projects for myself, my kids, or friends, and I've decided to start sharing the patterns I create so others can create with them as well.


Last year I made myself a costume for Halloween.  It was a steampunk version of River Song.  I made a leather vortex manipulator to go along with the costume.  I've turned it into a PDF pattern and listed it for sale in my Etsy shop.  Click the image below to check it out!


Friday, April 19, 2013

Altering a Dress Form for Long Torsos - Tall Dress Form

I'm sure anyone who is taller than average or has a long torso can relate to the frustration I've felt when buying clothing, sewing with commercial patterns, or finding a dress form to use when altering / test fitting clothing.  Adjustable forms sold at fabric stores offer the ability to change girth, and some are even able to adjust back length (with a change made at the waist), which helps, but doesn't solve the full problem.  There's also the issue of extra length above the bust line (which is why store-bought empire waist shirts/dresses or anything with a defined waistline, like jackets and coats, never work for me -- one of the main reasons I wanted to learn to make my own clothes).

After much searching online I found a jersey covered, fiberglass dress form with somewhat realistic measurements (which were actually very close to my own).  It looked something like this:

[I don't have a full step-by-step since I purchased this dress form and did the initial alteration about 9 years ago.]  I knew it needed to be elongated in two different places so, after removing the cover, I marked a line around the chest above the bust and at the waistline.


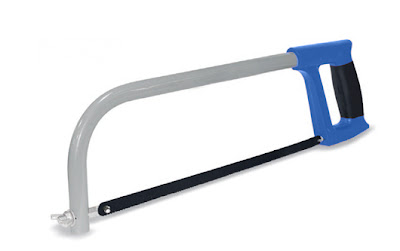
Then a took out the hack saw and had at it.  I admit I felt strange sawing away at something that resembled a human form...

After the from was cut, I spaced out the pieces using some things I had around the house -- big Glue Dots and a somewhat rigid plastic folder.  I cut the folder into wide tabs long enough to overlap between the pieces of the from and space the pieces out as much as I needed.  I used the big Glue Dots to attach the tabs to the inside of the form.

Cat on a Limb-1030.jpg
Inside the dress form (at the neck)
When that was done I used strips of muslin dipped in plaster of paris to wrap around and solidify the extensions.  After letting it dry for a few days I added some batting for padding on a few areas to make it my  measurements, and put the cover back on.

Over the years and after two kids, my body changed a little bit, so I needed to change the padding (take away in some areas, add in others).  I also decided to sew a new cover and re-stain the wooden tripod base.   I'm much happier with the form now. :)

Dress Form Alteration 4

Dress Form Alteration 3

Dress Form Alteration 1

Dress Form Alteration 2

-------------------------------------------------------------------
I'll be linking up to these fabulous link parties:

Monday -  Craft o Maniac Monday -- Craftastic Monday -- Tuesday -  Get Your Craft On -- Sew Cute Tuesday -- Tuesday Talent Show --  Wednesday -  Sugar and Dots -- Your Whims Wednesday -- Create and Share -- Whatever Goes Wednesday --  Linkin’ with Lil’ Luna -- Thursday -  Strut your Stuff Thursday -- Transformation Thursday -- Thrilling Thursday -- Make It Wear It -- The 36th Avenue Party Time -- Friday -  Flaunt it Friday -- Frugal Friday -- Weekend Wander -- Tickled Pink Fridays -- Weekend Wrap-up Party -- Catch as Catch Can -- Friday Flair -- Feature Yourself Friday -- Simply Link {Party} -- Pity Party -- Frugalicious Friday --  Saturday - Strut Your Stuff --  Lovely Crafty Weekend --  Sweet Saturday -- Sunday -  The DIY Showoff Project  Parade --  Sunday Showcase Party -- Creative Bloggers Party -- I Heart Naptime -- Think Pink Sundays

Monday, April 1, 2013

Stash-Busting Sale - Fabric, Beads, Leather, Lace

Help!

I need your help clearing out my stash of fabric and supplies!  It's decided -- I just have too much, way more than I can use in a reasonable amount of time.  So I'm having a stash-busting sale over at my Etsy shop - Cat on a Limb Accessoriz.  Although I find it hard to part with some of these awesome supplies (all those projects I had planned!), I'm putting them up for sale so you can use them instead!

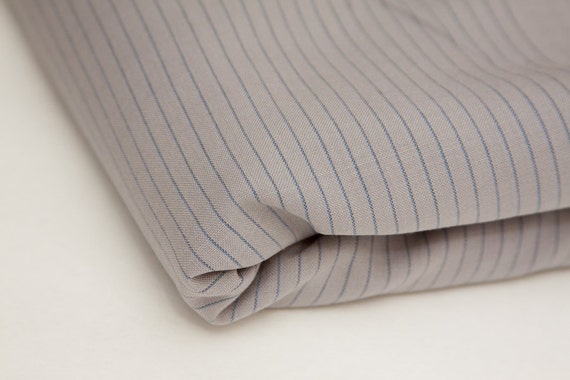
I've listed fabric like this lightweight pinstripe wool suiting --


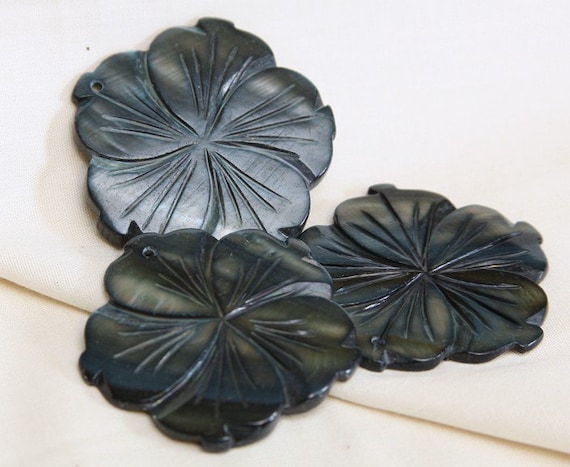
Beads like these flower pendants made from sea shells --


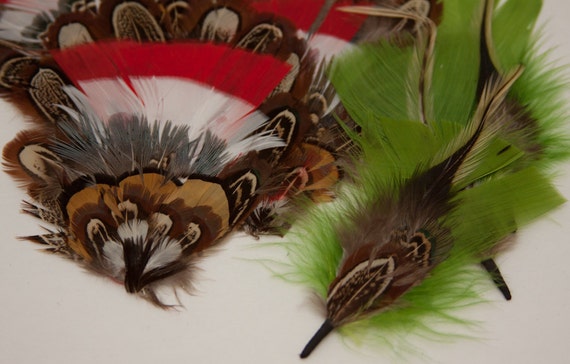
Feathers like these --


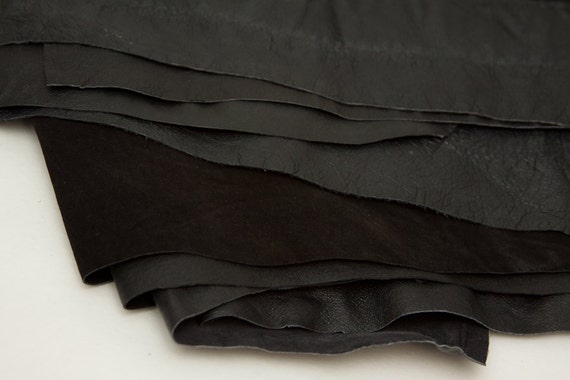
Leather bundles like this --


And much more!  Click here to stop by my Etsy shop to check it out!  I'm also including some coupon codes to choose from (feel free to spread the word and pass these along!) --

CLEAROUT -- 15% off your order
CLEAROUT25 -- 25% off your order when you spend at least $25
CLEAROUT50 -- Free shipping when you spend at least $50

Maybe if it goes well it will motivate me to add more fabric and supplies.  Thank you for your help!

Oh and P.S.  This is not an April Fool's joke. :)

Tuesday, March 19, 2013

Whole Wheat Mini German Pancakes

Whew!  What a busy semester this has been!  Needless to say I haven't been posting as frequently as I would like.  I'm finishing up a couple of projects in my [infrequent] spare time and will be posting a bit about some things I've learned in my classes so far.  For now, here's a recipe for a fun breakfast food I made recently.

Cat on a Limb-1010.jpg

I first learned to make German pancakes in my cooking class in middle school. (Yay elective courses!)  I've made them regularly over the years and was delighted when one of the blogs I subscribe to posted a recipe for minis.  Perfect, my kids would love them, especially how they puff in the oven!  I altered the recipe slightly and we had a great breakfast... even if mine didn't turn out as perfectly intact as hers.  :)  I think I needed to grease the muffin pan a little more.  

Cat on a Limb-1006.jpg


Cat on a Limb-1017.jpg


Whole Wheat Mini German Pancakes
(adapted from Chef in Training)
makes 18-24 pancakes

6 eggs
1 c whole wheat pastry flour
1 c milk or equivalent
1/2 t sea salt
1 t vanilla extract
1/4 c butter, melted

Syrupy Raspberry Sauce
1 c water
1/4 c sugar or honey
1 t lemon juice
2 1/2 T cornstarch
1 1/2 c raspberries

Preheat oven to 400 degrees F.  Grease two 12-count standard muffin tins, for a total of 24.  Blend together eggs, flour, milk, salt, vanilla, and butter until smooth.  Pour batter into prepared muffin tins until each cup is about half full.  Bake for 15-18 minutes until puffed up and golden brown.

For raspberry sauce: Cook water, sugar, lemon juice, and cornstarch* in a medium saucepan over medium heat until it thickens up. Stir in raspberries and simmer for about 10 minutes.

Fill each mini German pancake with sauce, sprinkle with powdered sugar (optional) and enjoy!

*To keep it from clumping, place the cornstarch in a measuring cup, add about 1/4 t of water and mix until evenly combined, add a few drops more and mix again, continue several times until the cornstarch is evenly blended and thin enough to pour.  Then add to the pan of other ingredients. 

-------------------------------------------------------------------
I'll be linking up to these fabulous link parties:

Monday -  Craft o Maniac Monday -- Craftastic Monday -- Tuesday -  Get Your Craft On -- Sew Cute Tuesday -- Tuesday Talent Show --  Wednesday -  Sugar and Dots -- Your Whims Wednesday -- Create and Share -- Whatever Goes Wednesday --  Linkin’ with Lil’ Luna -- Thursday -  Strut your Stuff Thursday -- Transformation Thursday -- Thrilling Thursday -- Make It Wear It -- The 36th Avenue Party Time -- Friday -  Flaunt it Friday -- Frugal Friday -- Weekend Wander -- Tickled Pink Fridays -- Weekend Wrap-up Party -- Catch as Catch Can -- Friday Flair -- Feature Yourself Friday -- Simply Link {Party} -- Pity Party -- Frugalicious Friday --  Saturday - Strut Your Stuff --  Lovely Crafty Weekend --  Sweet Saturday -- Sunday -  The DIY Showoff Project  Parade --  Sunday Showcase Party -- Creative Bloggers Party -- I Heart Naptime -- Think Pink Sundays

Monday, February 18, 2013

YouTube Video Sewing Course and Sewing with Tigers

Source
I've been thoroughly enjoying my classes this semester. One of the classes I'm taking is "Apparel Construction". I love it because it's helping me get familiar with commercial production methods and industrial machines.  Most of what we have been doing so far is learning about and practicing with lockstitch machines and sergers.  While explaining about lockstitch machines my teacher said home machines and industrial machines are very similar in their functionality, although a home machine is like a house cat and an industrial machine is like a tiger.  I love that analogy and can definitely attest to its validity -- they are so powerful and SO fast.  It's somewhat difficult to get used to and my first sewing samples were laughable at best.  But I'm determined to wrangle that machine!  I love the idea of sewing with tigers.

I also learned that my school produced a series of videos on DVD to go along with the course.  Apparently these videos have been used by educators around the world and my school is frequently asked to produce more.  These videos also happen to be available on YouTube!  So if you're interested in getting more detail feel free to check out the series.  Here's the first video, all about tools used in sewing:


I hope you enjoy!
Related Posts Plugin for WordPress, Blogger...